What maintenance checklist keeps gull systems audit-ready on rooftops?
Introduction — Scenario Pain Point
Picture walking up an exterior maintenance ladder at a fish processing plant near Vigo or an import warehouse in Valencia. A third-party hygiene audit begins in forty-eight hours. The plant manager assumes the rooftop barrier holds firm because nobody heard alarms. You step onto the rooftop gravel. White, caustic droppings smear the fresh-air intake grilles. Even worse, half a dozen heavy yellow-legged gulls sit calmly along an HVAC bulkhead where a corner turnbuckle snapped in last month’s storm.
Audits fall apart over defects like that. Contamination risks multiply fast when wild birds nest above processing floors. Implementing a strict maintenance checklist for rooftop gull systems is the only reliable way facility managers and pest control operators protect buildings from expensive compliance non-conformities. Gulls don’t act like urban sparrows. They’re heavy, stubborn birds that test every joint in your defense.
High winds vibrate perimeter cables every single day. UV radiation beats down on synthetic fibers across long Iberian summers. Salt spray corrodes cheap fittings within months. Physical exclusion systems will fail if your technicians treat them as zero-maintenance installations. You need a structured, component-by-component verification process to catch loose brackets, sagging netting, and bent spikes before inspectors set foot on your site.
Environmental Stressors and Gull Colony Behavior on Coastal Roofs
Why do heavy bird exclusion systems deteriorate faster on commercial roofs than on interior warehouse ledges? The environment does half the damage; bird behavior finishes it. Coastal roofs throughout Spain and Latin America endure high thermal expansion cycles. Rooftop temperatures swing twenty-five degrees Celsius between midnight and noon. Sheet metal expands and contracts. That thermal movement loosens expansion anchors drilled into concrete parapets or hollow clay tile walls.
Add marine air to the mix. Airborne chlorides settle onto structural cable assemblies. If someone installed mixed metals—say, zinc-plated turnbuckles hooked into stainless wire—galvanic corrosion eats the threads from the inside out. Rust builds silently. Then a 70 km/h squall hits the coastline. The dynamic wind load lifts wide-span nets like sails, snapping compromised fittings and dropping the entire perimeter.
Gull biology accelerates mechanical failure. Adult yellow-legged gulls (Larus michahellis) and kelp gulls (Larus dominicanus) weigh up to 1.5 kilograms. They don’t just perch. They hop, fight, and sit in communal groups. When a cable loses tension, the netting sags. Gulls spot that depression immediately. They treat sagging net pockets as secure hammocks protected from ground predators.
Seasonal breeding cycles trigger extreme territorial aggression. Between March and July, breeding pairs search for flat gravel beds or sheltered voids behind rooftop chiller units. If Bird Proof Netting (HC130119) has pulled away from an edge bracket by just eight centimeters, gulls will squeeze through the gap. Once inside, they build nests out of twigs, plastic strapping, and seaweed. Guano accumulates quickly, where uric acid corrodes roof membranes and creates standing water pools that fail facility inspections.
The Maintenance Checklist for Rooftop Gull Systems: Five Field Phases
A thorough inspection demands methodical hands-on work. Technicians can’t evaluate structural integrity through binoculars from an access doorway. You have to walk the perimeter, touch the hardware, and test cable tension by hand. Follow this five-phase field procedure on every scheduled service visit.
Phase 1: Structural Anchorage and Perimeter Rigging
Begin where structural loads concentrate. Every rooftop net installation depends on a continuous perimeter wire rope held by intermediate and corner anchors.
- Corner and Corner-Straining Brackets: Inspect every M8 or M10 eyebolt anchored into masonry parapets or structural steel. Shake each anchor firmly. If there’s any play in the substrate, mark it for immediate redrilling. Look for hairline cracks in brickwork or concrete caused by hydraulic pressure or wind vibration.
- Turnbuckles and Barrel Strainers: Check the lock nuts on every turnbuckle. High winds cause barrel strainers to spin loose if technicians forgot copper locking wire or jam nuts. Ensure at least 30% of the thread remains inside the barrel for future re-tensioning.
- Wire Rope Tension: Strike the perimeter wire with your hand. It should feel taut like a steel guitar string, with minimal vertical deflection under hand pressure. Measure deflection on spans longer than ten meters; sag should never exceed 25 millimeters under dead load.
- Intermediate Guide Fixings: Check screw-eyes and multi-purpose drive rivets every meter along the cable run. Replace any plastic rawlplugs that show signs of backing out from thermal cycles.
Phase 2: Mesh Seams and Tension Distribution
Technicians conducting a structured field verification must assess overall mesh tension, checking for sagging sections, compromised hog rings, and seam integrity where spans join.
Once the perimeter frame proves solid, shift focus directly to the net fabric across the entire span.
- Sag and Center Support Cables: On spans wider than twelve meters, cross-wires must support the net from underneath. Verify that center support wires haven’t slipped their turnbuckle clamps. A sagging net that touches rooftop mechanical pipes allows gulls to land and peck through the square mesh.
- Mesh Strand Integrity: Walk the net boundaries looking for severed twine strands. Rooftop service contractors often slice small openings with utility knives to service pipe valves, then walk away without repairing the breach. Patch any split mesh immediately using matching twine and manual net knots.
- Corner Hog-Ring Closures: Inspect the stainless steel hog rings connecting the net edging to the perimeter cable. Every mesh square along the edge must have a fastener. If rings are spaced every second or third square, wind flutter will pull the net off the wire.
- Zippers and Access Hatches: Unzip every service access hatch built into the netting. Check for split zipper coils and lubricate the sliders with dry silicone spray. Ensure the stainless carabiners securing the zipper tabs remain closed and free of grit.
Phase 3: T Type Bird Spikes and Secondary Exclusion Lines
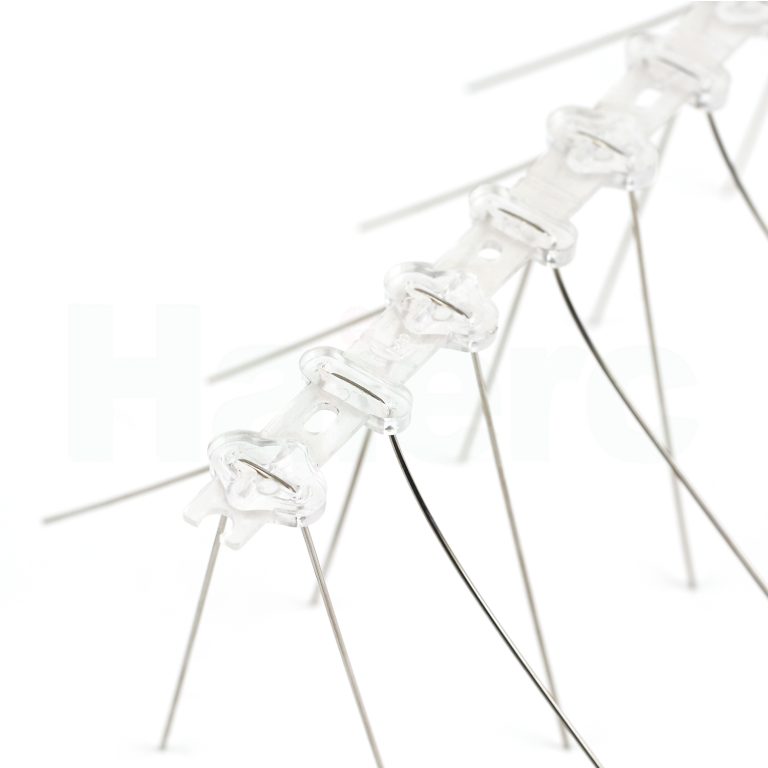
Gulls frequently land on narrow parapet caps, metal ducts, and steel frames where standard netting cannot easily be deployed. Incorporating T Type Bird Spikes (HC1101-T1) along these exposed structural surfaces provides a humane deterrent that disrupts their landing attempts.
- Adhesive and Mechanical Bonds: Push on bird spikes installed along stone parapets or sheet-metal flashing. Rooftop adhesives degrade under intense UV rays and standing water. If a spike strip rocks under gentle thumb pressure, scrape away the dead adhesive and re-bed the base using an exterior structural polyurethane compound.
- Pin Alignment: Gulls land with significant downward momentum. Check whether stainless steel wire pins have been crushed flat or splayed outward by landing birds. Bend deformed pins back to their original vertical and angled spread. Replace sections where pins snapped at the polycarbonate base.
- Perimeter Gap Auditing: Measure the distance between parallel rows of spikes. For large gulls, gaps wider than 65 millimeters between spike tips leave an open landing strip. Add an extra row if parapet caps measure wider than 200 millimeters.
Phase 4: Drainage Pathways and Debris Removal
Exclusion hardware must never compromise building drainage. Gulls drop nesting debris, shells, and bones that migrate toward roof scuppers.
- Gutter and Drain Clearance: Inspect internal valleys and box gutters underneath your nets. Clear leaves, bird droppings, and gravel. A blocked drain floods the roof, rots roofing membranes, and draws insects that attract more birds.
- Biological Sanitization: Wash guano deposits off mechanical equipment and structural hardware. Always wet droppings thoroughly with an approved biocidal solution before scraping. Dry sweeping guano releases hazardous fungal spores into HVAC air intakes.
- Foreign Object Removal: Retrieve loose items sitting on top of the net. Tree branches, plastic bags, and dead birds weigh down mesh panels and create tear points during heavy storms.
Phase 5: Documentation and Compliance Logging
Auditors demand proof of consistent management. A physical inspection without a service log counts as zero work in a regulatory audit.
- Photo Verification: Photograph every structural corner, turnbuckle assembly, and repaired mesh section. Keep time-stamped images in your facility IPM file.
- Tension and Torque Logs: Record torque values on structural bolts where facility engineering specifications require mechanical sign-off.
- Defect Tracking: Note recurring stress points. If the southwest corner anchor fails twice in twelve months, the rigging needs redesign rather than another quick patch.
Let’s look at hardware options that withstand these harsh conditions and minimize repair cycles.
Hardware Selection That Reduces Rooftop Maintenance Cycles
Selecting heavy-duty hardware built for marine industrial environments cuts maintenance labor in half. Light-duty hardware designed for small residential patios will snap under coastal wind shears and gull landings.
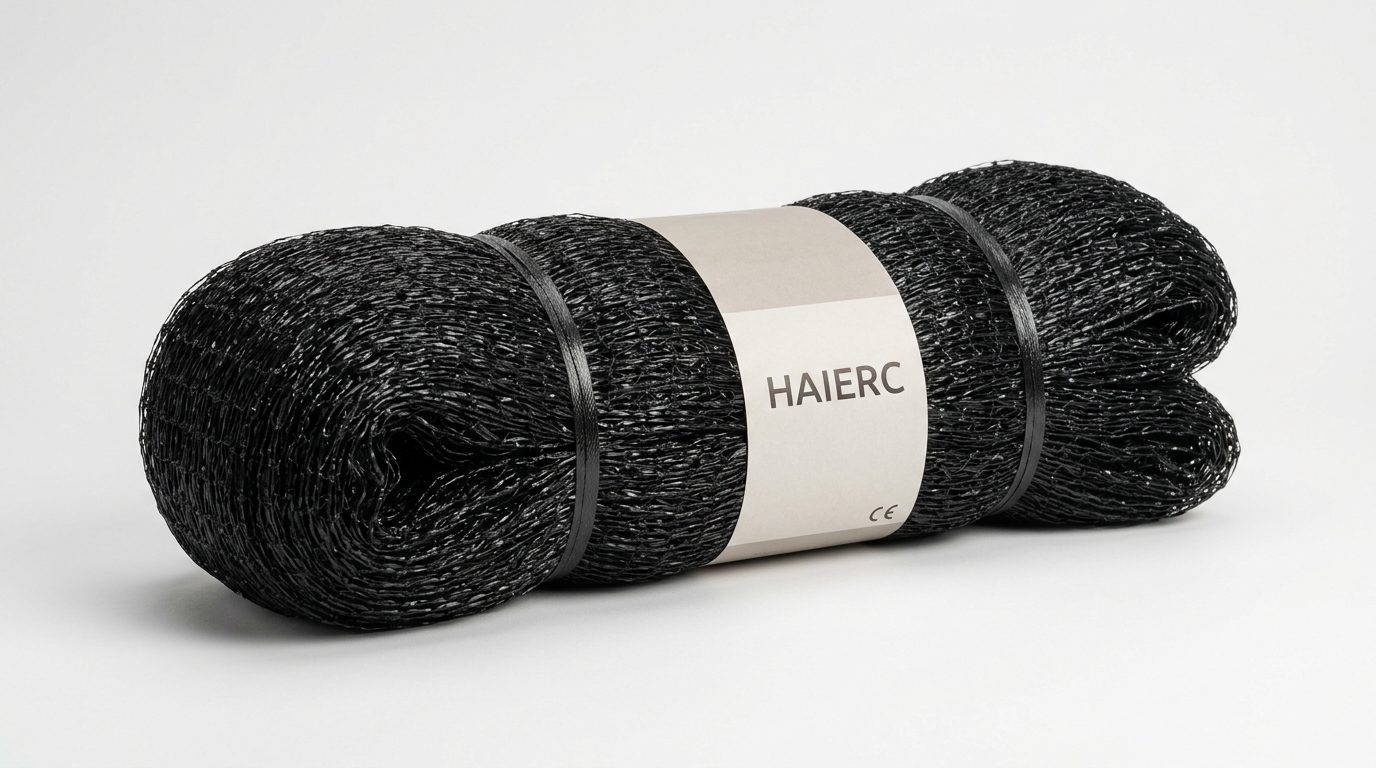
For roof and open air-well protection, Bird Proof Netting (HC130119) provides an overhead exclusion barrier when installed correctly. Manufactured from HDPE UV stabilized material, this industrial grade netting resists heavy solar exposure on exposed commercial rooftops. Because it resists water absorption, the netting avoids substantial weight gain during rainy conditions. Offered in multiple mesh sizes, it deters gulls from passing through the netting plane while allowing wind and weather to move through easily, helping streamline the maintenance checklist for rooftop gull systems.
| Specification | Bird Proof Netting (HC130119) | T Type Bird Spikes (HC1101-T1) |
|---|---|---|
| Primary Function | Complete area exclusion over roof zones | Perimeter ledge and parapet defense |
| Base Material | HDPE UV stabilized twine | UV resistant PC base |
| Metal Components | Fitted to stainless perimeter cables | SUS304 stainless steel pins |
| Target Pest Pressure | Heavy nesting, roosting, and loafing | Perching, day roosting, and landing |
| Maintenance Focus | Cable tension, seam rings, sag checks | Adhesive bond, pin angle alignment |
On perimeter flashings, steel I-beams, and rooftop pipe racks, T Type Bird Spikes (HC1101-T1) stop gulls from establishing sentry perches. Built with a UV resistant PC base and durable SUS304 stainless steel pins, this humane deterrent handles coastal humidity without rusting. The rigid SUS304 pins prevent large gulls from treading down the barrier, while the polycarbonate base features pre-formed break points that allow easy sizing around complex HVAC framework.
For wider concrete parapets, facility teams often pair these with W Type Bird Spikes (HC1101-W4) to expand physical exclusion across broad masonry surfaces. Installing durable physical deterrents across high-pressure roosting ledges helps sustain routine exclusion programs by eliminating sheltered footholds before seasonal nesting routines begin.
Hardware quality determines how often you need to climb that access ladder. Cheaper materials always cost more in emergency service callouts.
Common Rooftop Maintenance Mistakes and Field Realities
Even experienced technicians make avoidable errors when dealing with rooftop bird proofing. Recognizing these mistakes saves hours of rework and prevents audit penalties.
The most frequent mistake is ignoring wire rope tension balance. Technicians often overtighten the perimeter cable on one wall while leaving the adjacent wall slack. That uneven tension pulls corner brackets sideways, stressing masonry plugs until they pop out of the parapet. Always tension opposite sides progressively, checking cable deflection as you go.
Another widespread failure involves adhesive selection on roofing membranes. Standard construction silicone won’t bond reliably to aged EPDM rubber, modified bitumen, or dusty galvanized zinc. When midday heat strikes, cheap adhesives soften, and wind rolls entire strips of spikes right off the coping. Always clean surfaces with isopropyl alcohol, scrape flaking mineral granules, and use professional-grade polyurethane or MS-polymer adhesives rated for exterior industrial exposure.
Don’t skip intermediate net clips. Some operators secure netting to perimeter wire every 300 millimeters to save installation time. That leaves loose flaps of netting between clips. Strong winds catch these pockets, vibrating the twine against sharp metal roof flashings until the cord cuts through. Every single mesh square along the edge must clip directly into the perimeter wire using heavy-gauge stainless hog rings.
Finally, never allow technicians to inspect rooftop installations without fall protection gear. Anchor points for safety harnesses must remain entirely independent from bird control hardware. Never clip a safety lanyard to a bird netting cable or intermediate bracket. Those fittings support horizontal net tension, not the arrest force of an adult worker.
Frequently Asked Questions
Q: How often should facility teams run a rooftop gull system checklist?
A: Commercial facilities should execute a complete hands-on inspection quarterly. In coastal regions with severe winter storms, run an extra visual check after any wind event exceeding 70 km/h. Early spring checks in February or March are critical to catch hardware failures before gulls begin their nesting cycle.
Q: What causes bird spikes to detach from metal roof flashings?
A: Adhesives fail due to improper surface preparation, thermal expansion, and UV breakdown. When technicians glue spikes over greasy factory coatings or weathered oxidation without priming, the bond breaks within months. Mechanical riveting or using specialized MS-polymer adhesives on cleaned metal prevents strip detachment.
Q: Can damaged bird netting be patched without replacing the entire span?
A: Yes. Cut away the frayed strands to create a clean square opening. Cut a replacement piece of Bird Proof Netting (HC130119) two mesh squares larger than the hole. Splice the patch into the existing net using stainless steel hog rings or UV-treated twine at every perimeter mesh intersection.
Q: How much cable sag is acceptable on wide-span rooftop netting?
A: On standard installations, net sag should not exceed 25 to 50 millimeters over a ten-meter span. If netting sags enough to touch underlying HVAC units, conduit, or roof gravel, install intermediate support cross-cables with barrel strainers to lift the center of the span.
Q: Are plastic bird spikes as effective as stainless steel models for gulls?
A: Heavy gulls frequently snap or bend all-plastic spike pins when attempting to land. Professional setups use models like T Type Bird Spikes (HC1101-T1), which combine an engineered UV resistant PC base with SUS304 stainless steel pins that maintain their vertical resistance against heavy birds.
Securing Compliance Across Coastal Roofs
Maintaining rooftop bird barriers requires discipline, proper rigging technique, and hardware built for severe weather. Gulls will exploit any dropped cable, loose corner bracket, or detached spike row. When health and safety inspectors walk your site, finding bird guano or nesting materials above processing areas leads to immediate audit failure.
Systematic inspections protect your physical assets and prevent costly downtime. Equip your service teams with proven hardware like Bird Proof Netting (HC130119) and T Type Bird Spikes (HC1101-T1) to ensure physical defenses survive punishing coastal environments.
Visit Haierc to explore technical specifications, request detailed product catalogs, and review physical exclusion hardware engineered for demanding commercial pest management applications.
About Haierc PCO
Haierc PCO manufactures physical pest-control hardware in Tianjin, China, with 18+ years of experience and 1000+ items in production. Haierc holds ISO9001; products are offered to CE, REACH and RoHS requirements where applicable; the factory is BSCI and SEDEX audited. Commercial terms: MOQ from 100 pcs; OEM / private label from 500 pcs. Contact: info@haierc.com | +86 18602234188 | https://www.haierc.com